Ever scrolled through Instagram and seen nails that look so soft, so glossy, and so seamlessly beautiful they remind you of a pat of creamy, melted butter? That’s no filter magic—it’s the butter nails trend, and it’s taking the manicure world by storm. If you’re tired of harsh, glittery styles or matte finishes that show every smudge, butter nails offer a sophisticated, wearable, and utterly luxurious alternative. This trend is all about achieving a flawless, high-shine, gel-like finish with a color so saturated and smooth, it looks like it’s been softly buffed to perfection. Whether you’re a nail art novice or a salon regular, this guide will walk you through everything you need to know to get—and maintain—the dreamiest set of butter nails right at home or at your favorite salon.
What Exactly Are Butter Nails?
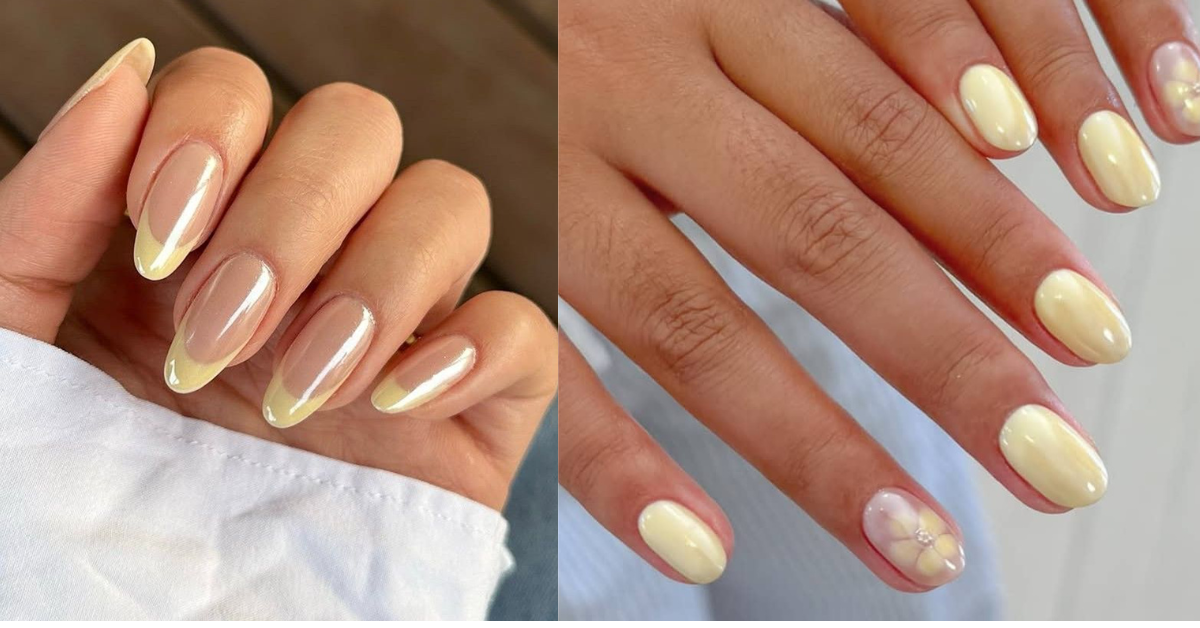
Let’s start with the basics. Butter nails are not a specific product, but rather a manicure technique and aesthetic. The name perfectly captures the final look: nails that have the rich, creamy, and glossy appearance of softened butter. Think of a super high-shine, jelly-like finish with opaque, milky color that has zero streaks or imperfections.
The key characteristics include:
- A High-Shine, Gel-Like Finish: The top coat is non-negotiable. It’s all about that wet, reflective look that lasts.
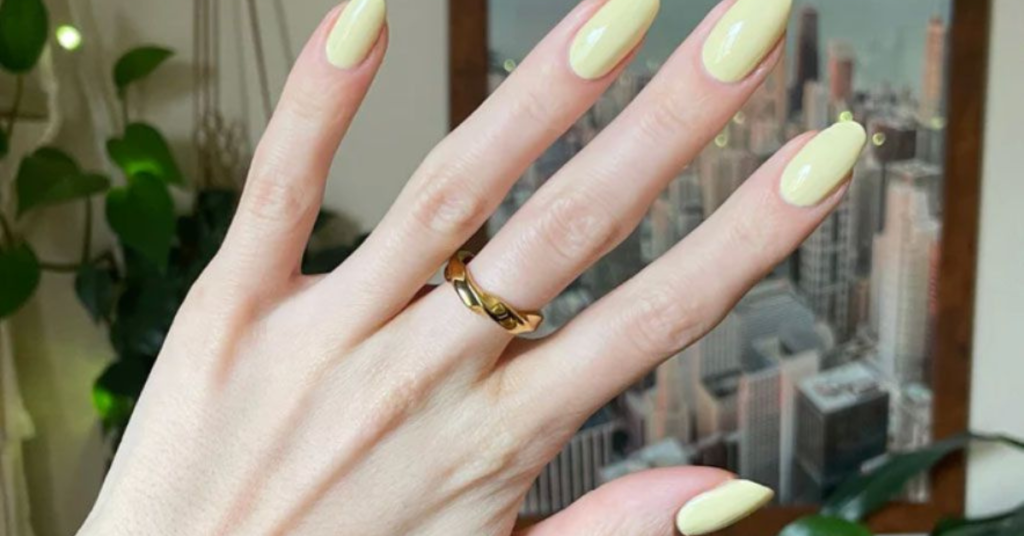
- Creamy, Opaque Colors: While you can use any color, the trend is strongly associated with soft, creamy neutrals, pastels, and milky shades. Think “butter yellow,” creamy white, soft beige, and blush pink.
- A Smooth, Plump Appearance: The color should look deeply saturated and even, giving the nail a healthy, “plumped” effect, much like a fresh gel manicure.
- Minimal to No Nail Art: The beauty is in the simplicity. The focus is solely on the flawless color and sublime finish.
Butter Nails vs. Other Manicure Trends
It’s easy to get confused, so here’s a quick breakdown:
- Vs. Gel Nails: Gel polish is often the best method to achieve butter nails. The trend describes the look, while gel is the product that can create it.
- Vs. Glazed Donut Nails: Glazed donut nails are a close cousin, but they often involve a metallic or pearlescent shimmer over a nude base. Butter nails are purely creamy and glossy, without the shimmer.
- Vs. Classic Cream Polish: A regular cream polish can aim for the butter look, but without that impeccable, self-leveling application and mega-glossy top coat, it often falls short.
Why You’ll Love the Butter Nails Trend
This isn’t just a fleeting fad. The butter nails trend has stuck around for some great reasons:
- Extremely Versatile: That soft, glossy finish is appropriate for any occasion—from a boardroom meeting to a weekend brunch or a formal wedding.
- Flatters Every Skin Tone: The palette of creamy neutrals and pastels is universally flattering. You just need to find your perfect shade.
- Makes Nails Look Healthier: The plump, glossy effect can make shorter nails look nurtured and elegant, while giving longer nails a touch of classic glamour.
- Low-Maintenance Beauty: Unlike intricate nail art, a chipped butter manicure is less noticeable, and the grow-out phase is more forgiving because of the soft colors.
- The Ultimate “Clean Girl” Aesthetic: It perfectly complements the minimalist, health-focused beauty trend that prioritizes looking polished and put-together with ease.
How to Get Perfect Butter Nails: A Step-by-Step Guide
You can achieve this look with both regular and gel polish. Here’s your actionable plan.
Option 1: The Salon Route (Easiest & Longest-Lasting)
If you want a flawless, long-lasting result, ask your nail technician for:
- A Gel Manicure. This is the gold standard for butter nails.
- Your Chosen Cream Color. Point to the soft, creamy, opaque shades on the wall. Don’t be afraid to ask for swatches.
- A High-Shine, No-Wipe Top Coat. Specify you want the glossiest finish they have. The “no-wipe” part is key for that clear, glass-like shine.
Option 2: The At-Home DIY Method
With a little practice, you can master this at home. Here’s what you’ll need:
Your Toolkit:
- A good base coat (prevents staining and improves adhesion)
- Your chosen cream nail polish (2-3 coats will be needed)
- A high-gloss, quick-dry top coat (this is the secret weapon!)
- Nail polish remover & cotton pads for cleanup
- A small angled brush (for easy cleanup)
- Cuticle oil
The Step-by-Step Process:
- Prep is Everything: Remove old polish, push back cuticles gently, and lightly buff the nail surface to create a smooth canvas. Wipe with alcohol or polish remover to dehydrate the nail and remove oils.
- Apply a Thin Base Coat. Let it dry completely.
- Apply Your Color in Thin Coats. This is the most crucial step. Do not glob on thick coats. Apply a thin, even layer of your cream polish. Let it dry about 90% before applying the next thin coat. You will likely need 2-3 coats for full, streak-free opacity. Patience here prevents bubbles and smudges.
- Seal with The Glossy Top Coat. Once your color is totally dry to the touch, apply a generous (but not dripping) layer of your high-shine top coat. Float the brush over the nail to cover the color without dragging it. Wrap the tip of your nail to seal the edge and prevent chipping.
- Clean Up & Nourish: Use your angled brush dipped in remover to clean up any polish on your skin. Once fully dry, massage in cuticle oil. This adds to the healthy, luxe look and promotes nail health.
Pro Tip: For an even more “plump” effect, look for a jelly or slightly translucent cream polish. Apply 3 thin coats to build up that deep, juicy color.
The Best Colors & Brands for Butter Nails
The right shade makes all the difference. Here are some categories and renowned brands to explore:
- The Classics: OPI (“Bubble Bath”, “Put It in Neutral”), Essie (“Fairy Tailor”, “Mademoiselle”), Sally Hansen Miracle Gel (“Cafe Au Lait”).
- Luxury Creams: Deborah Lippmann (famous for rich, creamy formulas), Olive & June, Smith & Cult.
- The Butter Nails Signature: Look for shades named things like “Buttercream,” “Milk,” “Custard,” “Vanilla,” “Almond Cream,” or “Blush.”
Choosing Your Shade:
- Fair Skin: Try creamy whites, soft pink blushes, or lavender pastels.
- Medium Skin: Warm beiges, peach-toned creams, and caramel hues look stunning.
- Deep Skin: Rich caramel, chocolate creams, and deep mauve creams offer incredible contrast and elegance.
Maintaining Your Butter Nails: Keep Them Looking Fresh
To extend the life of your manicure and keep that buttery shine:
- Re-Top Coat: Every 2-3 days, add another thin layer of top coat. This refreshes the shine and strengthens the seal.
- Oil, Oil, Oil: Apply cuticle oil 1-2 times daily. Hydrated cuticles make the whole manicure look neater and prevent peeling.
- Wear Gloves: For household chores, especially washing dishes or cleaning.
- Mind Your Edges: Be gentle with your nails. Use tools instead of them to open packages or pop tabs.
Butter Nails FAQ
Q: Can I get butter nails on short nails?
A: Absolutely! In fact, this trend is fantastic for short nails. The creamy, glossy finish makes them look elegant, clean, and well-kept.
Q: How long do butter nails last?
A: A professional gel butter manicure can last 2-3 weeks. A careful at-home manicure with regular polish can last 5-7 days with proper top coat reapplication.
Q: I have ridges on my nails. Can I still get the look?
A: Yes! The secret is in the prep. Use a good ridge-filling base coat before applying your color. It creates that perfectly smooth “buttery” canvas.
Q: Are butter nails just for neutral colors?
A: While neutrals define the trend, the technique works with any cream-finish color. A glossy, deep red or navy applied with this method could be called a “bold butter” look!
Q: What’s the biggest mistake people make when trying this at home?
A: Impatience. Applying thick coats of polish or not letting layers dry properly results in streaks, bubbles, and smudges. Thin coats and patience are your best friends.
The butter nails trend is more than just a pretty look—it’s a lesson in minimalist elegance and the power of a perfect finish. It proves that you don’t need extravagant designs to make a statement; sometimes, the most impactful style is one of understated, creamy perfection. It’s a manicure that makes you feel put-together, sophisticated, and subtly trendy all at once.
So, whether you book that salon appointment or carve out some “me-time” for a DIY session, give butter nails a try. Embrace the process, find your perfect creamy shade, and enjoy the simple pleasure of glancing down at your hands to see a glossy, beautiful reminder of just-made, effortless style. Your dream manicure is waiting—and it’s smoother than ever.