Imagine capturing the rich, decadent essence of your favorite luxury chocolate bar and wearing it on your fingertips. That’s the irresistible allure of chocolate nails—a manicure trend that has taken the beauty world. More than just a simple brown polish, this trend embodies warmth, sophistication, and a touch of delicious indulgence. It’s a versatile, flattering, and surprisingly modern choice that works for every season and occasion.
Whether you’re a nail art novice or a salon regular, achieving the perfect chocolate manicure can be confusing. How do you choose the right shade? What designs work best? This guide is your one-stop resource, packed with actionable tips and inspiration to help you master the chocolate nails trend and solve your manicure dilemmas. Get ready to ditch the uncertainty and embrace a look that’s as timeless as it is tasty.
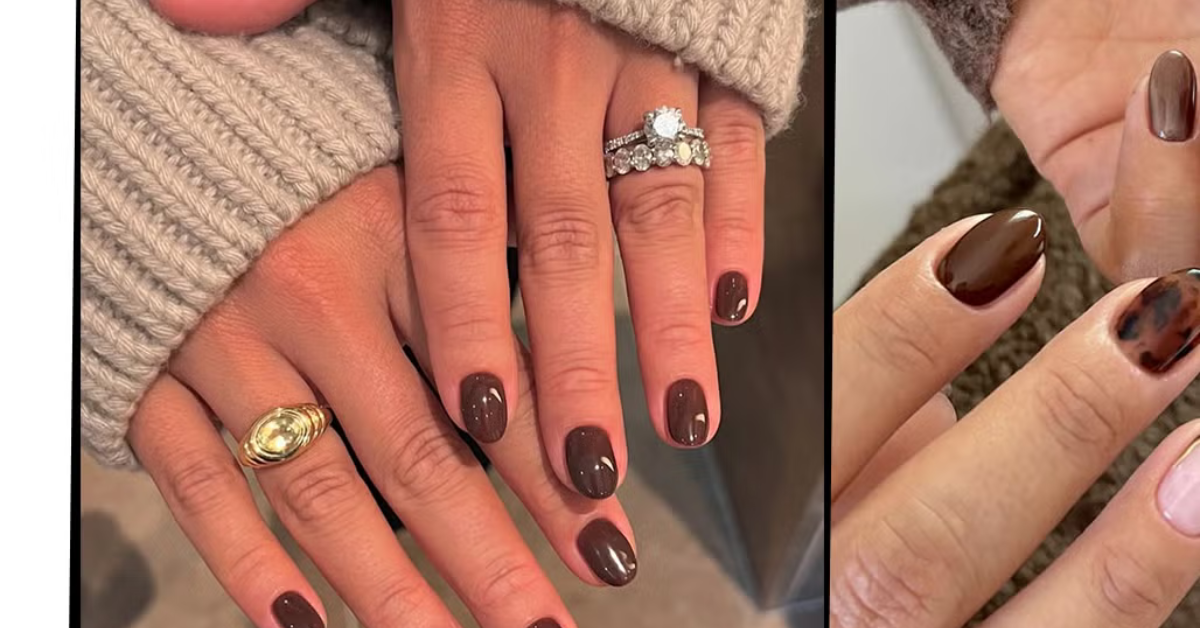
Let’s start by unwrapping the concept. Chocolate nails aren’t defined by a single shade. Instead, they represent a spectrum of brown-based polishes that evoke the delicious notes of cocoa, from creamy milk chocolate to deep, dark 70% cacao and even reddish-toned ruby chocolate.
The beauty of this trend lies in its depth and warmth. Unlike cooler neutrals like grey or beige, chocolate tones have a natural warmth that complements a wide range of skin tones, adding a healthy, sun-kissed glow to your hands. It’s a neutral, but never a boring one. It’s professional enough for the boardroom yet sensual enough for a night out, making it the ultimate versatile manicure choice for the modern woman.
Not all chocolates are created equal, and neither are chocolate nails. Picking the right shade is crucial for a look you’ll love.
- The Vibe: Soft, approachable, and creamy.
- Best For: Fair to light skin tones. It’s a fantastic “my nails but better” shade that offers a subtle, polished look.
- Actionable Tip: Opt for shades with a hint of caramel or beige. Apply two thin coats for a perfectly opaque, glossy finish that looks like liquid candy.
- The Vibe: Bold, sophisticated, and deeply modern.
- Best For: Medium to deep skin tones, where it creates a stunning, high-contrast effect. Also perfect as a dramatic alternative to black.
- Actionable Tip: Look for polishes with a jelly or creme finish. A high-shine top coat is non-negotiable here to mimic the glossy sheen of a chocolate truffle.
- The Vibe: Rich, spicy, and full of dimension.
- The Shades: These include polishes with reddish undertones (like a chocolate-covered cherry) or cool, espresso-brown shades with a greyish base.
- Best For: Adding unexpected flair. Ruby chocolate shades are universally flattering, while espresso tones suit cooler skin undertones beautifully.
- Actionable Tip: Test the polish in natural light. A ruby-toned brown can look drastically different under store lighting.
Pro Tip: Before committing to a full set, paint a single swipe of polish on a white business card and hold it against your skin. This instantly shows you the undertone and how it will interact with your complexion.
A flawless application makes all the difference. Here’s how to get salon-perfect chocolate nails at home.
- Prep is Key: Start with clean, dry nails. Gently push back your cuticles and lightly buff the nail surface to create a smooth canvas. Never skip the dehydrator or a swipe of rubbing alcohol—this removes oils so the polish adheres properly.
- Base Coat, Always: Apply a thin layer of a quality base coat. This prevents staining (darker polishes are notorious for this) and extends your manicure’s life.
- The Main Event – Polish Application: Use the “three-stroke method.” Load your brush, then place a blob of polish in the center of your nail, about halfway down. Gently push it up toward the cuticle, then drag it down to the tip. Repeat with a stroke on the left side and a stroke on the right. Thin coats are better than thick, gloppy ones! Let the first coat dry completely before applying the second.
- Seal the Deal: Once your color is completely dry, lock it in with a high-gloss top coat. Wrap the tip of your nail by running the brush along the free edge to prevent premature chipping.
- Cuticle Oil Finale: After your top coat is dry to the touch, apply cuticle oil. This hydrates your skin and adds a beautiful, healthy sheen to the entire manicure.
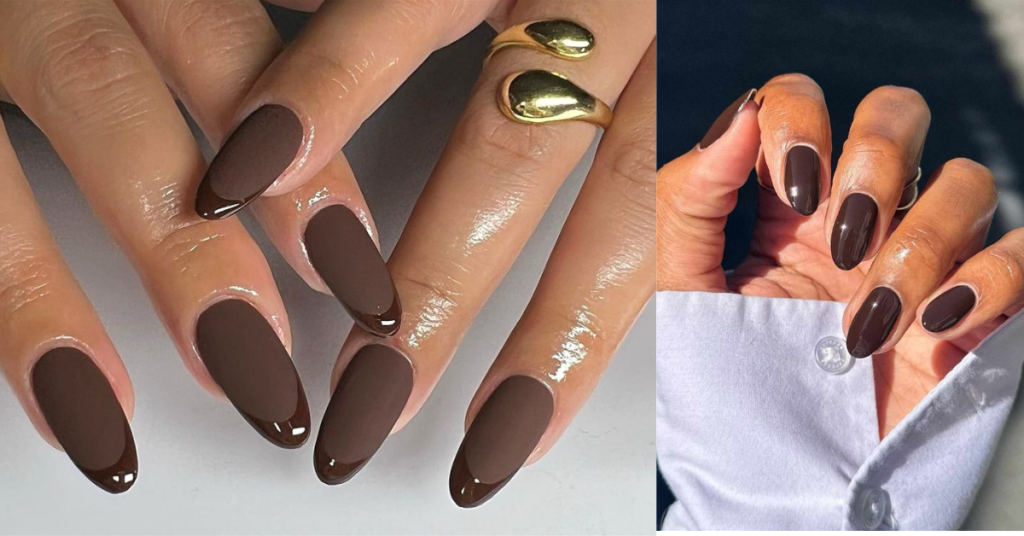
The fun begins with design! Chocolate nails are a perfect base for endless creativity.
Ditch the stark white. Use a metallic gold, shimmering bronze, or even a creamy nude for the tips. It’s elegant, updated, and incredibly chic.
This viral trend is perfect for chocolate nails. Achieve it by using a glossy brown creme as your base and adding a shiny, clear gel or jelly top coat that pools slightly at the edges, creating that irresistible “glazed” effect.
Paint all nails a rich dark chocolate and choose one or two accent nails for something special.
- Try: A sheer glitter top coat, a minimalist gold foil design, or a single horizontal metallic stripe.
- Actionable Tip: Use nail art striping tape for perfectly straight lines. Apply it to the dry base color, paint over it with your metallic polish, and peel the tape off immediately for a crisp line.
This is a high-fashion look that’s easy to do. Paint all nails with your chosen chocolate shade and a glossy top coat. Once completely dry, use a matte top coat on every nail except your ring fingers. The contrast between the velvety matte and glossy shine is stunning.
Your beautiful chocolate nails deserve to last.
- Glove Up: Wear gloves for washing dishes, cleaning, or any task involving harsh chemicals and hot water.
- Reapply Your Top Coat: Every 2-3 days, add a fresh layer of top coat. This fills in micro-wear and renews the shine.
- Touch-Up Kit: Keep your polish and a small detail brush handy. For small chips at the tip, lightly buff the chipped area, apply a tiny amount of polish, and seal with top coat.
- Moisturize Daily: Healthy nails and hydrated cuticles are the foundation of any great manicure. Apply hand cream and cuticle oil every night.
Q: Are chocolate nails suitable for short nails?
A: Absolutely! In fact, deeper shades like dark chocolate can make shorter nails look incredibly elegant and elongated. A simple, glossy creme finish is perfect for short lengths.
Q: I have fair skin. Will chocolate nails look good on me?
A: Yes! The key is choosing the right tone. Fair skin looks gorgeous with milk chocolate, caramel-toned browns, or even ruby chocolate shades. Avoid very dark, cool browns if you’re worried about contrast.
Q: Can I do chocolate nails with regular nail polish, or do I need gel?
A: You can achieve a beautiful look with both. High-quality regular polish (with a good top coat) can last a week. Gel polish will offer more shine and longevity (2-3 weeks) but requires a UV/LED lamp and proper removal to avoid nail damage.
Q: What colors go well with chocolate nails for nail art?
A: Chocolate is a neutral, so it pairs with almost anything! Gold, bronze, and cream are classic. For a bolder look, try cobalt blue, burnt orange, or dusty pink.
Q: How do I prevent brown polish from staining my nails?
A: A dedicated sticky base coat or a double layer of your regular base coat is the best defense. Never apply a dark polish directly to the bare nail.
Chocolate nails are more than just a passing fad; they’re a testament to the power of a perfect neutral—one that is warm, sophisticated, and endlessly adaptable. From finding your ideal shade in the cocoa spectrum to mastering application and exploring stunning designs, you now have all the tools to create a manicure that feels both personally indulgent and impressively polished.
So, go ahead—raid your polish collection or treat yourself to a new bottle of delicious brown. Experiment with a glossy finish, try a chic matte accent, or keep it beautifully simple. Your perfect, problem-solving manicure is waiting. Embrace the sweetness and sophistication of chocolate nails; your fingertips will thank you for it.